3D Mark Viewer
3DDrag to rotate
White Fl(2)(Fl(2))
Topmark:Two spheres
IALAIntermediate
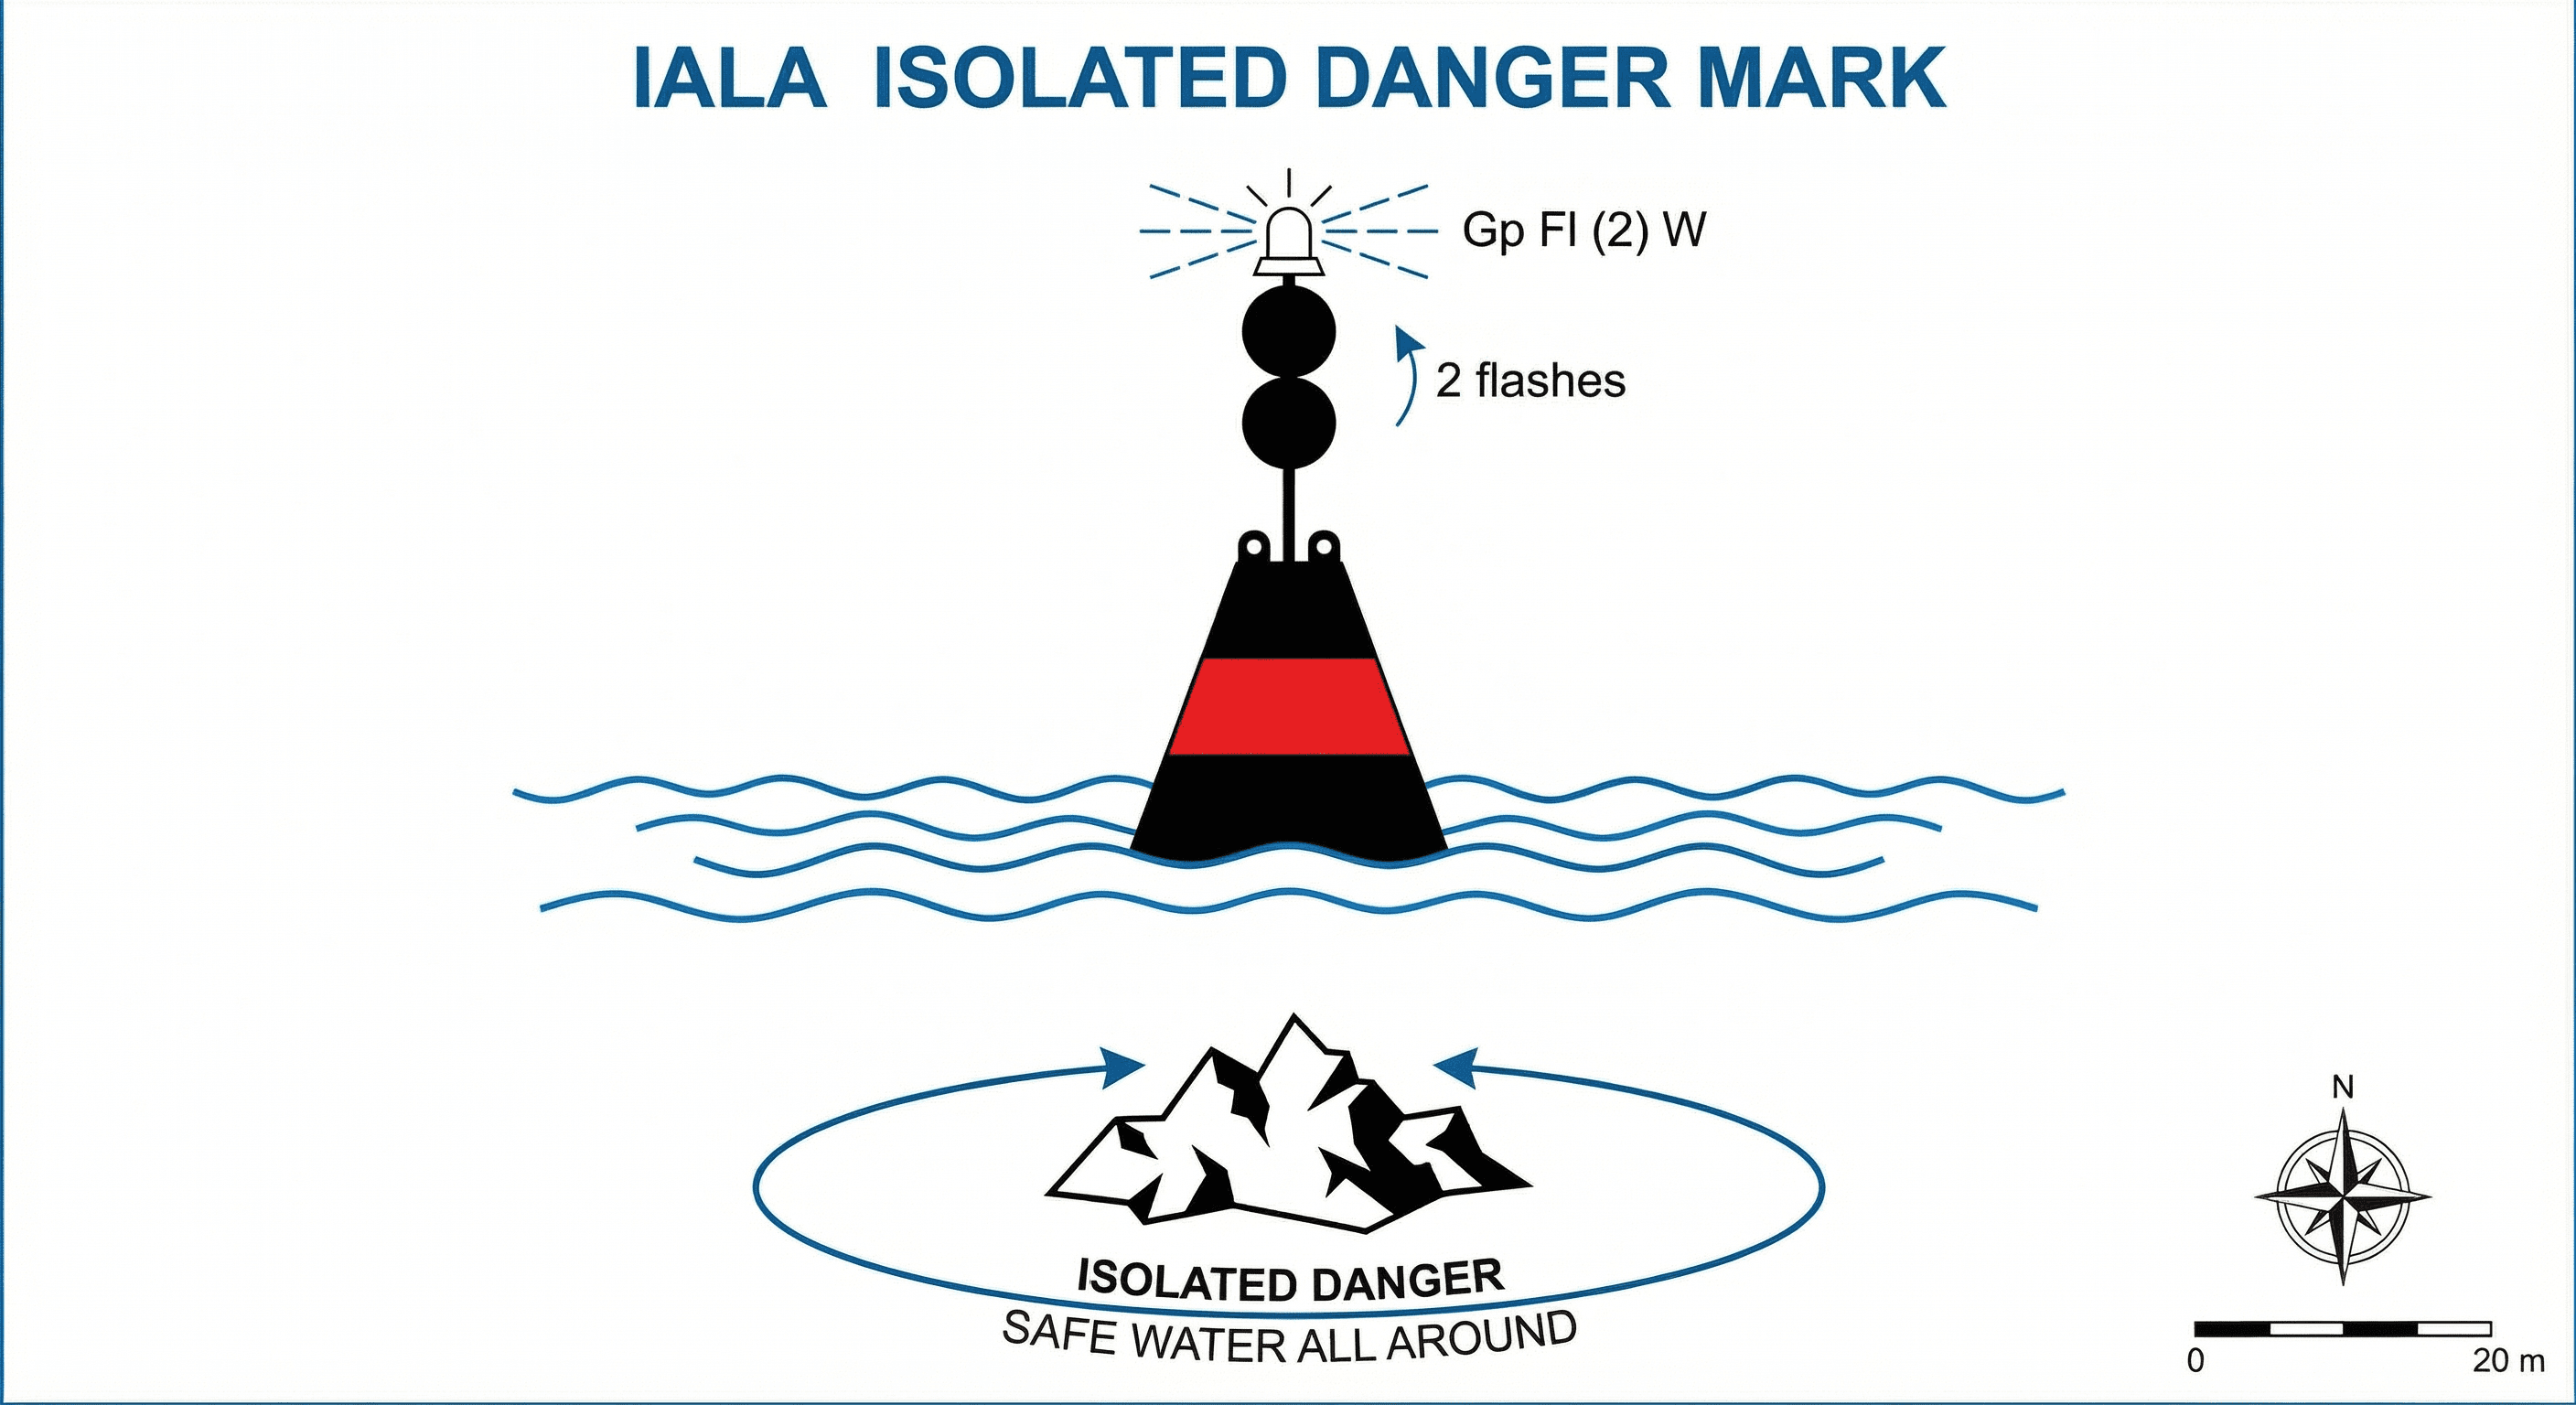
Isolated danger marks
An isolated danger mark is placed on or moored above a hazard with navigable water all around it. Give wide clearance—do not pass between the mark and the danger.
Detailed Explanation
An isolated danger mark sits on or over a hazard of limited extent with safe water around it:
- Colour: black with one or more horizontal red bands
- Topmark: two black spheres, one above the other (mandatory where practicable)
- Light: white, Fl(2) — group of two flashes
Key point: although navigable water surrounds the mark, the exact extent of the underlying danger may not be charted precisely. Always give generous clearance on all sides. Do NOT attempt to pass between the mark and the hazard beneath it.
Key Points
- Marks a danger with navigable water all around
- Topmark: two black spheres vertical
- Colour: black with red horizontal band(s)
- Light: white Fl(2) — group of 2 flashes
Examples
- You spot a black buoy with a red horizontal band and two black spheres as topmark. This is an isolated danger mark — the hazard is directly beneath or near the mark, but navigable water surrounds it. You keep a safe distance.
- At night you observe a white light showing Fl(2) — two flashes in a group. This identifies an isolated danger mark. You give it clearance on any side while maintaining a safe margin from the charted danger.
Common Mistakes
- Trying to pass between the mark and the underlying danger instead of giving the mark wide clearance all around.
- Confusing the isolated danger topmark (two black spheres) with a cardinal topmark (two cones).
- Mistaking the Fl(2) white light of an isolated danger mark for a buoy with a different rhythm and ignoring the hazard.