3D Mark Viewer
3DCardinal marks (N, E, S, W)
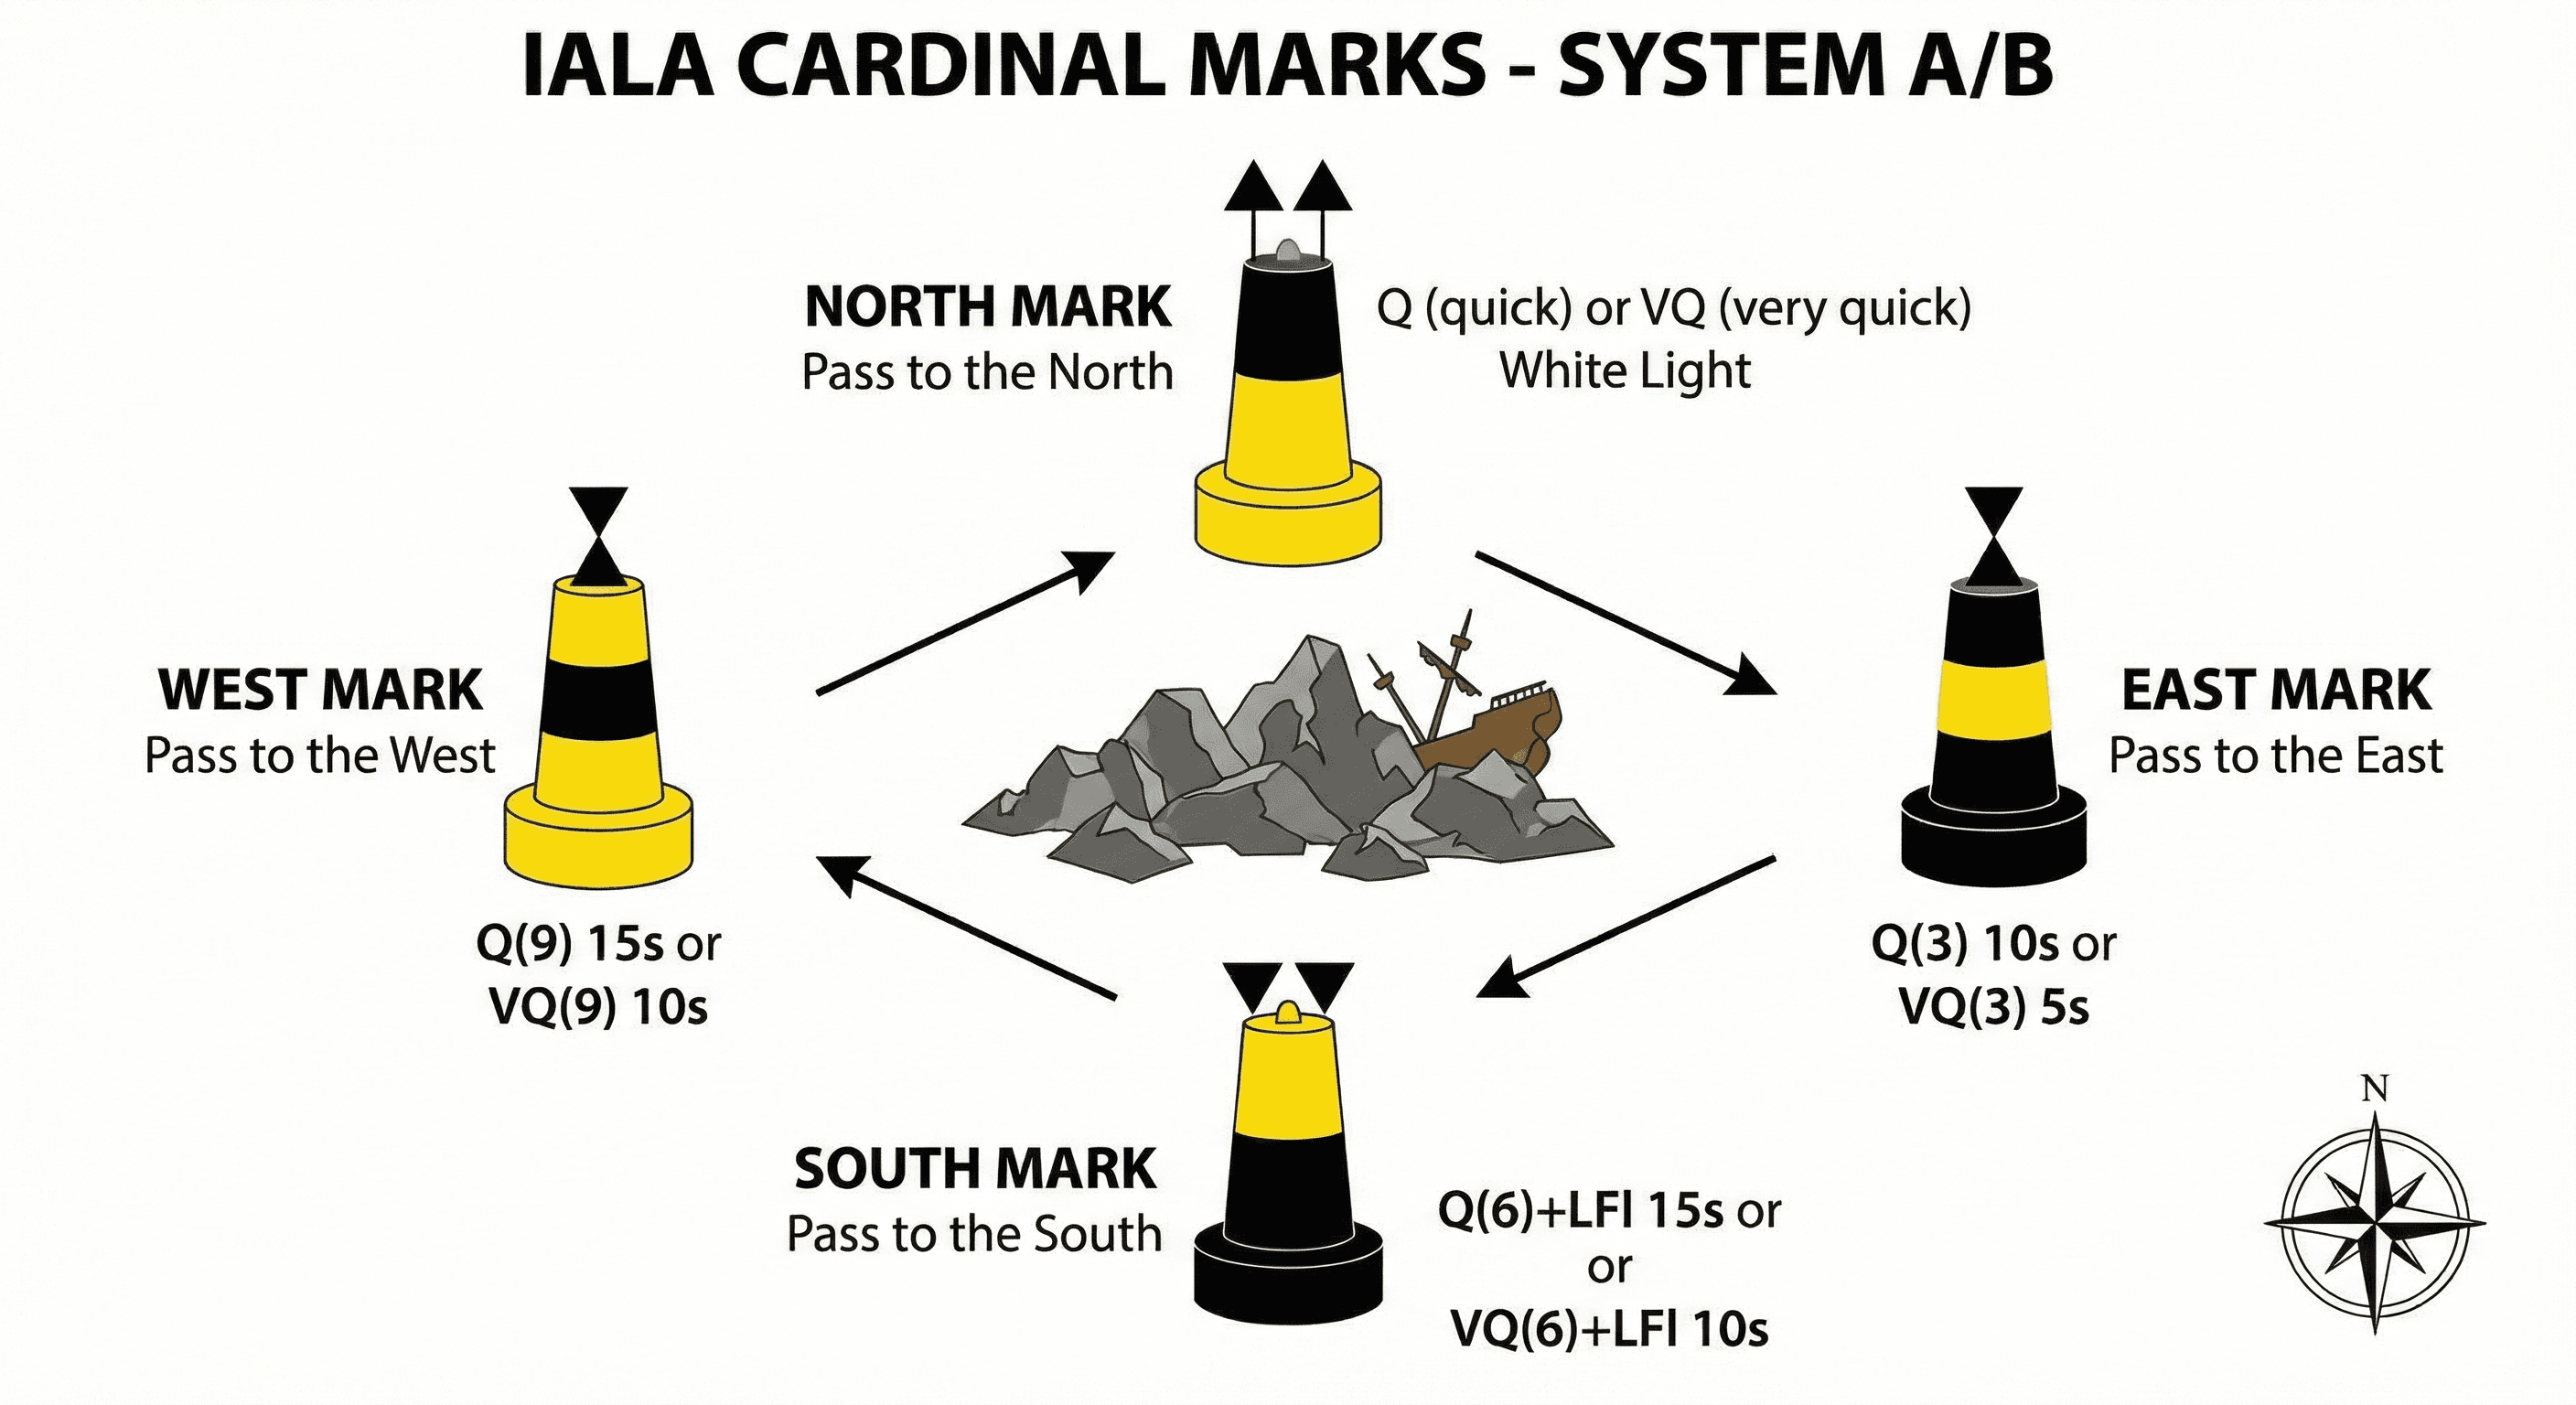
Cardinal marks indicate the compass quadrant where safe navigable water lies relative to a hazard, using black/yellow colour bands and cone topmarks whose arrangement encodes the compass direction.
Detailed Explanation
Cardinal marks are placed near a hazard to show which side has safe water:
North cardinal — pass to the NORTH
- Colour: black over yellow (BY)
- Topmark: two cones pointing UP ▲▲
- Light: white, VQ or Q (continuous flashing)
East cardinal — pass to the EAST
- Colour: black-yellow-black (BYB)
- Topmark: two cones base-to-base ▲▼
- Light: white, VQ(3) 5s or Q(3) 10s
South cardinal — pass to the SOUTH
- Colour: yellow over black (YB)
- Topmark: two cones pointing DOWN ▼▼
- Light: white, VQ(6)+LFl 10s or Q(6)+LFl 15s
West cardinal — pass to the WEST
- Colour: yellow-black-yellow (YBY)
- Topmark: two cones point-to-point ▼▲
- Light: white, VQ(9) 10s or Q(9) 15s
Memory aid: the topmark cones 'point' toward the black band(s). Flash count follows a clock face: 3 o'clock=East, 6=South, 9=West, 12(continuous)=North.
Key Points
- Safe water lies on the named compass side of the mark
- BYB = East, YBY = West, BY = North, YB = South (band patterns)
- Flash groups: 3=E, 6+LFl=S, 9=W, continuous/VQ=N
- Topmark cones: ▲▲=N, ▼▼=S, ▲▼=E, ▼▲=W
Examples
- You see a pillar buoy with black above yellow bands and two cones points up (North topmark). This is a North cardinal mark — safe water lies to the north; you pass north of it.
- At night you observe VQ(3) 5s white light: this identifies an East cardinal mark. You navigate to the east of the mark to remain in safe water.
- A South cardinal mark shows yellow above black bands with two cones points down. At night it displays VQ(6)+LFl 10s. You pass to the south to avoid the danger.
Common Mistakes
- Confusing the East (BYB) and West (YBY) cardinal band patterns.
- Passing on the wrong side of a South cardinal - safe water is to the south, not north.
- Mixing up VQ(6)+LFl 10s (South) with VQ(9) 10s (West) flash patterns.